The aim of this page is to walk through the production of a chart suitable for use in a Lowrance chartplotter, based on freely available and very detailed UKHO data (see this post for more information), coupled with the excellent Reefmaster software. Before using the result read the warnings, and understand that the result is not suitable for navigation.
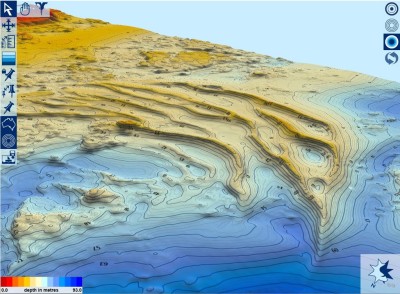
For this example I’ve chosen the Sound of Mull (and specifically the Lochaline area), but data is available for many other regions as well. Likewise the information isn’t just of use for Lowrance kit, although it does tend to lend itself to this type of work. Whilst it’s not entirely straightforward, by expending some time and effort you can create extremely detailed charts for roughly the same cost as a Navionics card (or the price of a half-decent fishing rod).
This “how to” works its way through the following steps:
– Downloading the UKHO survey data covering the Sound of Mull
– Import this data into Reefmaster
– Generate a chart within Reefmaster
– Export the chart from Reefmaster into an AT5 file usable by a Lowrance chartplotter
– Load the AT5 chart and display it on a chartplotter
Reefmaster has now been updated to allow direct import of UKHO surveys, which saves the considerable hassle of conversion from Cartesian to lat/long coordinates. I notice also that an increasing number of surveys are available and UKHO appear to be publishing more of their “back” catalogue, with data from the 1990s appearing alongside new work. All of this increases your opportunity to access detailed information for your area.
To generate an AT5 chart you will need to download an additional (free) piece of software from Lowrance/Navico – Insight Map Creator. Instructions on how to do this are included at the end of this guide.
Warning
The AT5 and other charts produced by this method are not quality assured in the same way as a full chart and do not contain information such as tidal streams or other navigational information. This has little bearing on their usefulness for fishing, but obviously means that you must not rely on them for navigation (there may also be other errors in addition to those identified to date). Use at your own risk!
How to download UKHO survey data
Go to http://aws2.caris.com/ukho/mapViewer/map.action to display a screen like that below:
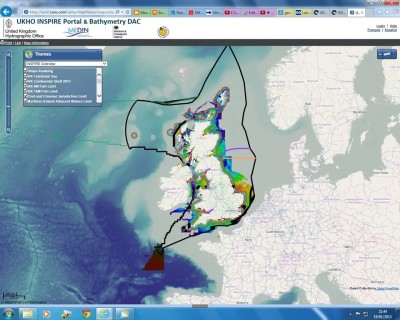
Go to the “Themes” menu box and select the “Inspire Overview” dropdown menu. In this select the “Download Bathymetry” option to see a screen similar to that below:
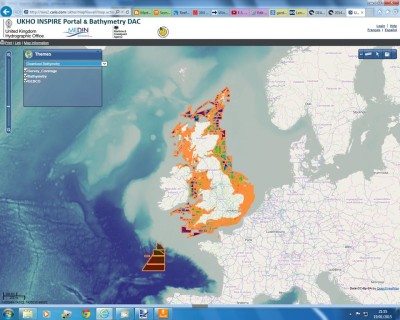
Zoom in to the rough area you are interested in and click on the file icon to view the available surveys for the zoomed area (the smaller the area zoomed into the smaller the number of available surveys to choose from).
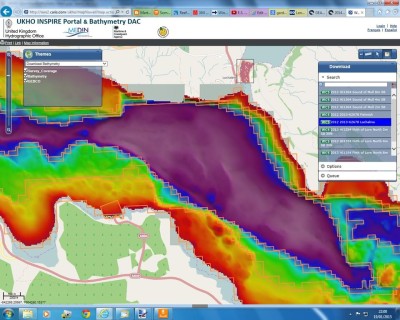
The “Search” box will list the available surveys in the area you’ve zoomed in to. Click on one that interests you and then on the “Options” button. This will display some more information about the survey and allow you to change certain details – be aware that it can take several minutes to display the full options screen, so be patient (the Inspire site is free, not fast!).
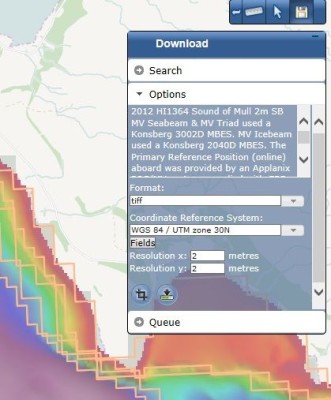 The key thing with the “Options” is to ensure you are downloading the “text/csv” format version – not “tiff” or the other file formats which are not readable by ReefMaster. You should also make sure you are downloading the WGS 84 co-ordinate system and note the UTM zone (e.g. 30 North in this example), as ReefMaster will need this information. Once you’re happy you are downloading the right version then click on the “Queue” icon.
A large survey may take several minutes to queue, but you can then click on the download icon to get the file on your computer. File sizes vary hugely from a few kilobytes up to over a gigabyte, and downloads are fairly slow so you may need to make several cups of coffee (or go fishing :-)) whilst you wait.
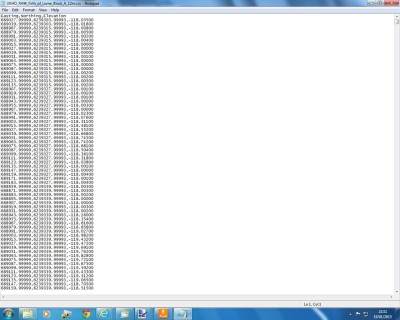
If you open the file in Notepad or similar (don’t use Excel, as it’s likely to choke on a large survey file) you’ll see something similar to the example below. This shows Cartesian coordinates rather than lat/long, with depth shown as negative metres – it all depends on how and when the survey was undertaken, but it does matter when you come to import the information into Reefmaster.
I save my downloads in a dedicated folder with fairly standardised filenames, which helps avoid downloading the same survey more than once. It’s worth noting that the same area may contain several survey layers representing 2m/4m/8m/12m survey grids, each with their own data file.
Next Steps
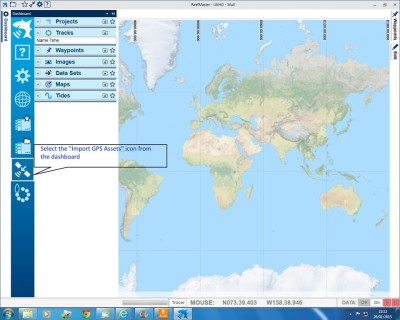
Open Reefmaster and create a new workspace – I’ve called mine “UKHO – Mull” for this exercise. Select the “Import GPS Assets” icon from the Dashboard menu, as shown below.
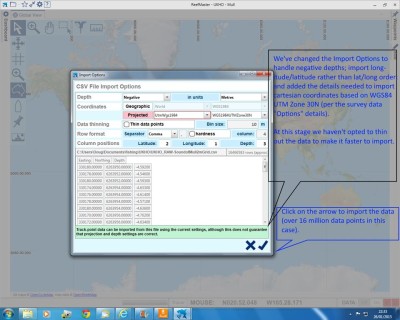
Select the data file(s) you want to import – the 2m survey grid in my case – and a popup will display asking for details of the file structure. This will vary from survey to survey, so pay attention to the options – e.g. are your depths shown as positive or negative values and in lat/long or eastings/northings style?
The screen below shows the corrected input screen for the Sound of Mull 2m survey grid. You can now import all 16 million rows, or choose to thin them out and get a slightly coarser chart as a result. Your choice will depend partly on the area you want to cover, as a fully detailed 2m grid over a large area (say 10km x 10km) will give Reefmaster severe indigestion. In this case I did thin out the data as it would have become unmanageable if all records were loaded.
Importing the data will take several minutes, depending on the speed of your PC. You will then (in the case of the Sound of Mull) need to repeat the steps to import the 4m and 8m survey data to build up a complete picture. Fortunately these files tend to be a lot smaller and easier to manage (4 million and 300k rows respectively).
Creating a Reefmaster Chart
With the UKHO survey data downloaded and imported into Reefmaster you are now in a position to generate a usable chart.
Zoom in from the “World” view to the area occupied by the survey. This may take several minutes to settle down, given we’re talking 20 million+ rows of data. You can then select the area you want to chart in detail – depending on how the survey data is laid out you may need to draw this fairly widely initially to pick up all the strands of information required.
Add the selected area to a new project within your workspace and the chart will be generated automatically.
Export the Chart from Reefmaster
We’ve now got a rather pretty chart to play with inside Reefmaster, complete with 3D fly through views, etc. However we really need to get this into our chartplotter so we can use it out on the water. This next bit is written specifically for output to a Lowrance LCX chartplotter, although a similar process can be followed for some other brands such as Hummingbird, and more recent versions of Lowrance kit can handle more colour schemes, etc.
Once you’re happy with the contour spacing, colours, etc. simply right click on the map and select the “Export map to file” option. In this case I’ve selected the simplest and default option as it will work OK with my 8 year old Lowrance 112C – if you have a newer piece of Lowrance kit you have more options and can use the “Export map using preset style” menu option, which is slightly quicker.
Two files are created, named “Large.at5” and “AT5.xml”. These are standard file names, so you should store each new AT5 chart in a separate folder (otherwise each new chart you generate will overwrite anything already created).
AT5.xml is a standard file that is the same for each chart generated, and I rename the “Large.at5” file to something more useful, such “Lochaline.at5”. You can copy multiple AT5 files to the same memory card together with one copy of AT5.xml and then load it into your chartplotter. All these files must be in the top/root directory of your memory card.
Loading/Using the AT5 Chart within your Lowrance unit
Within the Lowrance plotter menu change the selected chart from whatever Navionics chart you have loaded to either “Lowrance” or “None” (it depends on your device what option shows). Your AT5 files should display in the same way as the commercial charts – but you cannot display both overlaid on each other.
Appendix – Insight Map Creator (IMC) installation
The following is a straight lift from the Reefmaster website:
·Ensure that the most recent version of the Navico Insight Map Creator (IMC) is present on your computer.
| The Navico Insight Map Creator
In order to create AT5 maps, the Insight Map Creator (IMC) application is required. ReefMaster needs to know where this application is stored on your computer, so that it can be called during the map generation process. ·If you do not have the Insight Map Creator installed on your machine, download it from the Navico website (it is a free download, although you need to register to download it. The IMC can be found on the Insight Planner tab). ·Once the IMC has been downloaded, unpack the zip file and remember the location to which you unpacked the files. ·Click Save (the disk icon, at the bottom-right of the screen) and acknowledge the safety warning. ·If you have not previously told ReefMaster about the location of the IMC, a window will be shown asking for you to specify the location of the InsightMapCreator.exe file. Locate this file and click OK. ·Select a location for the finished map files. The easiest way to create maps for your unit is to write files directly to the root directory of a memory card. Note that any existing AT5 map files will be overwritten. |
Share this:


Hi, I have visited Resipole and used my 4mtr boat on Sunart many times. Indeed I will be booking a seasonal caravan pitch next year and again fishing Sunart.
I have intended to get a better plotter/sonar unit for ages and your article intrigues me. However I find that the link to download UKHO survey data doesn’t seem to work. Is it no longer available or has the link changed.
Regards Ian